Installing a new or reconditioned cylinder head is a significant investment of time and money in any engine rebuild or repair. This component is the crowning glory of the engine block, housing the valves, camshafts, and combustion chambers. Its integrity is absolutely crucial for proper engine performance, efficiency, and longevity. A flawless installation starts long before the head is bolted down—it begins with a meticulous, systematic inspection.
Skipping or rushing this pre-installation check is a recipe for disaster. A subtle warp, a hairline crack, or a clogged oil passage can lead to immediate and catastrophic engine failure after startup, necessitating a costly tear-down and repeating the entire process. This comprehensive guide details the step-by-step process of how to thoroughly inspect a cylinder head, ensuring it is in perfect, ready-to-install condition.
Why Pre-Installation Inspection is Non-Negotiable
The sheer complexity of the cylinder head means there are multiple points of potential failure, especially if the head has been previously overheated, warped, or improperly machined.
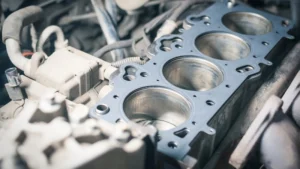
- Preventing Head Gasket Failure: The cylinder head and engine block must present a perfectly flat surface to the head gasket. Any deviation in flatness will compromise the gasket’s seal, leading to coolant leaks, oil contamination, or combustion gases entering the cooling system.
- Ensuring Proper Valvetrain Operation: Bent valves, damaged valve seats, or worn valve guides will directly impact airflow, leading to poor compression, reduced power, and eventually, expensive damage to the piston.
- Maintaining Thermal and Lubrication Integrity: Clogged coolant passages lead to localized hot spots and overheating, while restricted oil passages can starve the valvetrain of necessary lubrication, causing rapid wear.
Step 1: Surface Flatness and Warpage Check
The most critical factor for a successful head gasket seal is the flatness of the mating surface. Even a tiny amount of warpage can cause a leak.
The Straightedge Test
To check for warpage, you will need a certified precision straightedge and a set of feeler gauges.
- Clean the Surface: Ensure the mating surface is spotlessly clean. Any dirt, debris, or old gasket material will give a false reading. Use a non-abrasive cleaner and a plastic scraper, avoiding tools that could scratch the machined surface.
- Lay the Straightedge: Place the straightedge along the head in multiple predetermined patterns:
- Lengthwise, down the center.
- Lengthwise, along both the intake and exhaust sides.
- Diagonally, from corner to opposite corner.
- Crosswise, at several points along the width of the head.
- Use the Feeler Gauge: At each position, attempt to slide the feeler gauge between the straightedge and the cylinder head surface. Consult your engine’s service manual for the maximum allowable warpage tolerance. This tolerance is typically very small, often less than $0.002$ inches ($0.05$ mm) for aluminum heads.
- Action: If the deviation exceeds the manufacturer’s specified limit, the head must be professionally resurfaced (machined) or replaced. Resurfacing must be done carefully, as excessive material removal can affect the valvetrain geometry and compression ratio.
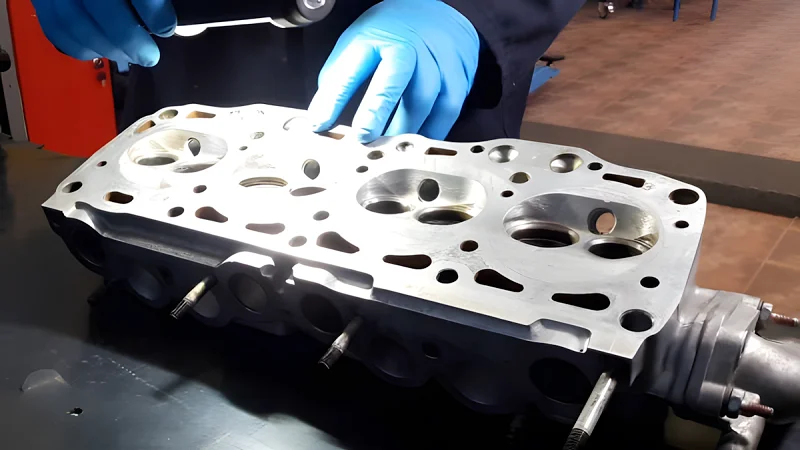
Step 2: Crack Detection and Pressure Testing
Cracks, often caused by severe overheating, are the silent killers of cylinder heads. They can be microscopic and nearly invisible to the naked eye, but they will rapidly allow combustion gases and coolant to mix under operating pressure.
Visual and Dye Penetrant Inspection
- Visual Scan: Focus on areas prone to cracking: the metal webs between the valve seats, the area around the spark plug bosses, and near the exhaust ports where temperatures are highest.
- Dye Penetrant Test: For a more definitive check on aluminum heads, a dye penetrant kit is essential.
- Clean the area thoroughly.
- Apply the penetrant dye and allow it time to seep into any cracks.
- Wipe the surface clean.
- Apply the developer (a white powder), which will draw the dye out of any cracks, making them visible as bright red lines.
Professional Pressure Testing (The Gold Standard)
The only way to guarantee a head is leak-free is through professional pressure testing.
- Process: The coolant passages of the cylinder head are sealed, and the head is then submerged in a tank of heated water (often around 180°F or 82°C. The heated water simulates engine operating conditions, causing the metal to expand and any cracks to open slightly. Air pressure (typically 40-60 psi) is then introduced into the sealed passages.
- Result: If a crack exists, a tell-tale stream of bubbles will rise to the surface of the water, pinpointing the location of the leak. Never skip this step if the engine history is unknown or if the previous failure was caused by overheating.
Step 3: Valvetrain Component Assessment
The valves, springs, guides, and seats must be in perfect working order to maintain proper combustion chamber sealing and timing.
Valve Seating and Stem Inspection
- Valve Seat Integrity: Look for even, consistent contact patterns on the valve seats. Pitting, burning, or an uneven contact patch (often indicated by a wide or narrow ring) suggests a poor seal and requires a valve job (re-facing the valves and/or re-cutting the seats).
- Valve Stem Wear: Check for wear on the valve stems, particularly at the ends where the keeper grooves are located. Excessive side-to-side movement of the valve within its guide indicates worn valve guides—a common issue that leads to oil consumption and requires replacement or reaming/sleeving.
Valve Spring Check
Valve springs are crucial for ensuring the valves close quickly and fully. Fatigue can cause the springs to weaken, leading to valve float at high RPMs.
- Free Height: Use a caliper to measure the free height (uncompressed length) of each valve spring. Compare this measurement to the factory specification. A spring that is too short is fatigued and must be replaced.
- Squareness and Tension: Check the spring for squareness against a flat surface. A crooked spring can cause side-loading and wear the valve guide prematurely. Ideally, springs should be tested on a spring tension tester to verify they meet the required pressure at a specific installed height.
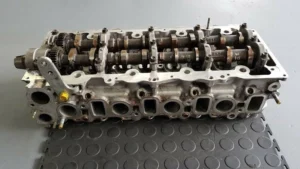
Camshaft and Lifter Surfaces (OHC Heads)
For Overhead Camshaft (OHC) designs, the camshaft lobes and the bearing surfaces must be flawless.
- Cam Lobe Profile: Visually inspect the cam lobes for any signs of pitting, scoring, or uneven wear, especially on the ‘nose’ of the lobe. Use a micrometer to measure the lobe height and compare it to the minimum specification.
- Bearing Journals: Inspect the journals (the surfaces that ride in the cam caps) and the corresponding bores in the head. Any scoring, galling, or discoloration indicates a lack of lubrication or debris, requiring immediate action. If the cam journals or bearing surfaces are damaged, the entire head may need to be replaced, as machining these surfaces is complex.
Step 4: Fluid Passage and Thread Integrity
The head is a critical routing component for oil, coolant, and fasteners. These must all be secure and clear.
Oil and Coolant Passage Cleaning
- Visual Confirmation: Ensure all oil galleries and coolant passages are clean and free of sludge, scale, or debris. Carbonized oil in the drain-back passages can restrict flow and cause oil to pool under the valve covers.
- Use a Brush and Air: Use a small rifle-bore brush or pipe cleaner to scrub the oil passages. Flush all passages with clean solvent and follow up with compressed air. Always wear eye protection when using compressed air. Pay special attention to the oil feed holes for the camshaft or rocker arm shafts.
Thread Inspection
The integrity of the bolt holes is paramount, as they determine the clamping force that secures the head and seals the gasket.
- Head Bolt Holes: Check the threads in all head bolt holes. If they are damaged or stretched, use a thread chaser (not a tap, which cuts new threads) to clean and repair them. A common problem with aluminum heads is threads pulling out; in this case, a thread repair insert (e.g., a helicoil or time-sert) must be installed correctly.
- Spark Plug Threads: Verify the spark plug threads are clean and undamaged. A dedicated spark plug thread chaser is the best tool for this.
Step 5: Final Pre-Assembly Checks
Before you reach for the torque wrench, a few final checks streamline the installation process.
- Cleanliness: This cannot be overstated. The head surface must be absolutely pristine, free of fingerprints, oil, or lint. Clean the surface with a non-residual solvent just before placing the gasket.
- Valve Stem Seals: Always install new valve stem seals. These inexpensive components are essential for preventing oil from leaking down the valve guides and being burned in the combustion chamber. Lubricate the new seals with a little engine oil before installation.
- Hardware Prep: Clean and inspect all head bolts. Many modern engines use Torque-To-Yield (TTY) bolts, which are designed to stretch during torquing. These bolts must be replaced with new ones every time they are removed. If using re-usable bolts, check their length against the service limit for stretching.
- Gasket Alignment: Ensure you have the correct head gasket for your application, paying close attention to orientation and fluid port alignment.
The Confidence of a Job Well Done
Performing a thorough, systematic inspection of your cylinder head is the single best way to ensure the success and longevity of your engine repair. While it adds time to the job, the peace of mind knowing the component is structurally sound, perfectly flat, and ready for service is invaluable. By meticulously checking for warpage, hidden cracks, and proper valvetrain function, you eliminate the most common causes of post-installation failure. A cylinder head that passes these tests is a head you can install with absolute confidence.
If your engine requires high-quality, dependable auto parts, including replacement cylinder heads and associated components, consider the precision and reliability offered by XinJin Auto Parts. As a factory dedicated to manufacturing durable and exact specification engine components, we understand the critical nature of quality. We welcome you to contact us directly to discuss your specific needs and learn more about our product line.