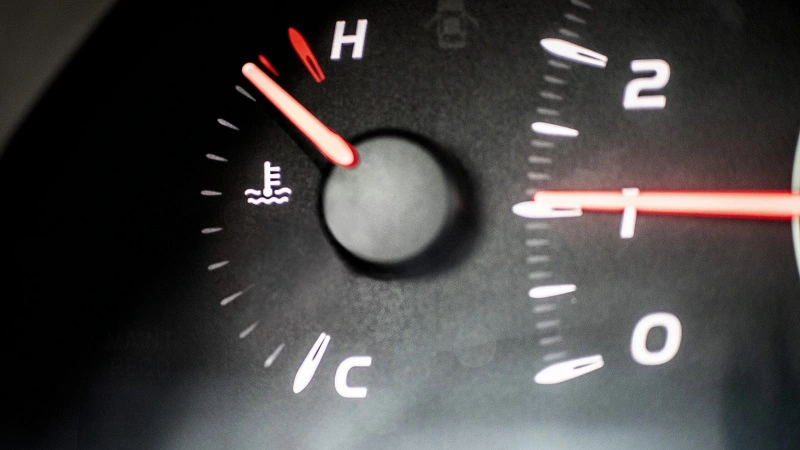
The unmistakable sight of steam billowing from under the hood, or the sickening realization that your temperature gauge has shot into the red zone, is one of the most stressful moments a driver can face. An overheated engine is not merely a temporary inconvenience; it is a critical emergency that, if mishandled, can lead to warped cylinder heads, blown gaskets, and potentially total engine failure—an outcome that often costs thousands to repair.
Knowing exactly what to do when your engine overheats is essential, not just for your safety, but for the longevity of your vehicle. This comprehensive, step-by-step guide will walk you through the immediate actions to take, the crucial inspection steps, and the preventative maintenance needed to stop car overheating from happening again.
Phase 1: The Emergency Response (Immediate Action Checklist)
When the dashboard warning light illuminates or you see that ominous white cloud of steam, time is of the essence. Your primary goal is to strip the engine of any unnecessary load and pull heat away from the critical components.
Step 1: Do Not Panic and Pull Over Safely
- Turn on Hazard Lights: Signal to other drivers that you are slowing down and need to exit traffic immediately.
- Find a Safe Location: Coast to the nearest safe pull-off point, shoulder, or parking lot. Do not stop in the middle of a freeway lane or a blind curve, even if the steam is heavy. If you absolutely cannot pull over right away, proceed to Step 2 while driving.
- Reduce Engine Load: Turn off all non-essential electrical systems, particularly the air conditioner (A/C). The compressor places a significant load on the engine, and turning it off is critical to relieving strain.
Step 2: Engage the Counterintuitive "Heater Trick"
If you are still driving and cannot immediately pull over, or if you are coasting to a stop, perform this maneuver instantly:
- Turn on the Heater: Set your car’s climate control to the highest possible temperature setting and the fan speed to maximum blast.
- Mechanism Explained: This seems wildly counterintuitive, especially on a hot day, but it works because your car’s heater core acts like a small, secondary radiator. By running the heater, you are drawing hot coolant from the engine and blowing the heat into the cabin, essentially rerouting and dissipating a significant amount of excess heat away from the engine block.
- Crack the Windows: To make the cabin bearable, open your windows to allow the immense heat you are pulling out of the engine to escape.

Step 3: Turn Off the Engine and Pop the Hood
Once you have reached a safe, level spot, you need to decide the next action based on how quickly you stopped.
- If the Temperature is Just Below Red: You may try turning the engine off, but leaving the key in the “accessory” or “on” position. This allows the cooling fans to continue running, drawing air across the radiator without adding the load of internal combustion. This can help the car cool down faster.
- If the Gauge is fully in the Red or the Steam is Heavy, turn the engine completely off. Further operation risks catastrophic damage.
- Secure the Vehicle: Engage the parking brake firmly.
- Pop the Hood (The Caveat): Release the hood latch. Do not immediately lift the hood. If heavy steam or white clouds are escaping, or if the hood is visibly shaking or extremely hot to the touch, wait five to ten minutes. Opening the hood prematurely exposes you to dangerously high temperatures and pressures. Once the steam subsides, lift the hood to allow the heat to escape and the engine to begin the cooling process naturally.
Step 4: The Crucial 30 to 45 Minute Waiting Period
This step is non-negotiable and represents the most important safety precaution for any driver dealing with an overheated engine.
- Do Not Touch the Radiator Cap: The coolant inside the system, even if the steam has stopped, can be well over 220°F (104°C). Because the system is sealed and pressurized, the coolant’s boiling point is raised. Removing the cap releases this pressure, causing the fluid to instantly flash boil into steam. This can result in a powerful, scalding jet of fluid and steam that causes severe burns.
- Wait for Cold: You must wait until the engine is completely cool to the touch. For most vehicles experiencing severe engine overheating, this takes a minimum of 30 to 45 minutes. Use this time to read your owner’s manual or arrange for assistance.
Phase 2: Post-Crisis Inspection and The Temporary Fix
Once the engine has completely cooled, you can safely assess the situation. This part of the process involves diagnosing the leak (the usual cause) and adding fluid only if necessary.
Step 5: Check the Radiator System Pressure (The Squeeze Test)
Before attempting to remove the cap, confirm that the pressure has indeed dissipated.
- Locate the Upper Radiator Hose: This large rubber hose connects the top of the radiator to the engine.
- Perform the Test: Using a thick rag or towel for protection (just in case), gently squeeze the hose.
- If the hose feels firm and hard to squeeze, the system is still pressurized. Do not remove the cap. Wait longer.
- If the hose compresses easily, the system is depressurized, and it should be safe to remove the cap.
- Removing the Cap: Even when cool, turn the radiator cap counter-clockwise slowly using a rag. Listen for any hiss of remaining pressure. If you hear a hiss, stop, allow the pressure to escape, and then proceed with removal.
Step 6: Inspect for Leaks and Low Coolant
The primary reason an overheated car fails is a coolant circulation issue caused by a leak.
- Check the Reservoir: The coolant overflow reservoir is usually a translucent plastic tank connected to the radiator. Check the markings (FULL/COLD or HOT/LOW). If the level is below the “LOW” mark, you have lost fluid.
- Look for Visible Leaks: Scan the engine bay, hoses, and the area directly underneath the car.
- Coolant Identification: Coolant (or antifreeze) has a distinctively sweet smell and is often green, but modern vehicles use various colors (pink, blue, orange, or yellow). It will have a thinner consistency than oil.
- Common Leak Spots: Check the radiator fins, the seams around the radiator, the upper and lower radiator hoses (look for cracks or bulging), and the water pump seal.
Step 7: Refill the Coolant (Or Substitute Water) Carefully
If the system is low, you need to refill it to safely get to a mechanic.
- The Best Option (50/50 Mix): If you have a bottle of the correct coolant, mix it with water in a 50/50 ratio before adding.
- The Emergency Option (Water Only): In a true roadside emergency where no coolant is available, you can add clean water (distilled is best, tap water will do in a pinch). Warning: Do not use water long-term, as it lacks the corrosion inhibitors and necessary anti-boil/anti-freeze properties that protect the engine.
- Refill Slowly: Add the fluid to the radiator or the reservoir until it reaches the cold fill line. Avoid pouring cold liquid directly onto hot engine components, even if the engine block has cooled down significantly.
After refilling, you can restart the engine. Keep the heater on, and immediately watch the temperature gauge. If the temperature climbs back into the red within minutes, shut it off immediately and arrange for a tow. If it stays within the normal operating range, you can attempt to drive directly to a repair facility.
Phase 3: Driving with an Overheating Engine (When You Have No Other Choice)
Towing is always the safest option when dealing with a recurring or major leak. However, if you are in a remote area or just need to reach the nearest exit, here are the techniques for driving short distances.
Knowing When to Tow vs. Limp Home
| Condition | Recommended Action |
|---|---|
|
Visible steam, major leak, gauge immediately hits red. |
Tow Truck Required. Driving risks total engine replacement. |
|
No visible leak, slow temperature rise, gauge stays near the red. |
Limp Home. Drive in short bursts to a nearby mechanic. |
|
Gauge drops after using the heater trick and stays stable. |
Proceed with Caution. Drive directly to a shop for diagnosis. |
The Stop-and-Go "Nursing" Technique
If you must drive, adopt this method:
- Drive for a short period (usually less than a mile) while constantly watching the gauge.
- When the needle approaches the red zone, pull over safely and turn the engine off.
- Wait 15-20 minutes for the engine to cool down again.
- Repeat the process.
Utilizing RPMs to Assist Cooling
When caught in stop-and-start traffic, running the engine at idle (very low RPMs) can sometimes cause the temperature to rise because the cooling fan and water pump are moving too slowly.
- Shift to Neutral or Park: If you are stopped for more than a minute, shift into neutral or park.
- Lightly Rev the Engine: Gently rev the engine to maintain about 2,000 RPMs. This speeds up the water pump, increasing coolant circulation, and spins the cooling fan faster, drawing more air across the radiator fins. This can sometimes lower the temperature gauge during a traffic stop.
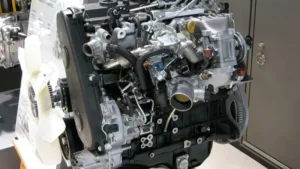
Phase 4: Understanding the Root Causes of Engine Overheating
To truly prevent the issue from recurring, you need to understand the source. Why is my car overheating? The problem almost always lies within one of the components of the cooling system.
Low or Leaking Coolant
The Most Common Culprit. Over time, coolant naturally evaporates, or small leaks can develop in hoses, gaskets, or clamps. If the fluid level drops too low, the water pump starts circulating air instead of fluid, and the engine’s temperature spirals quickly out of control.
The Thermostat Is Stuck Closed
The thermostat is a valve that controls the flow of coolant between the engine and the radiator. When the engine is cold, the valve is closed to allow the engine to warm up quickly. Once the engine reaches its optimal operating temperature (usually around 195°F/90°C), the thermostat opens fully. If the thermostat fails and gets stuck in the closed position, the coolant trapped inside the engine block cannot circulate to the radiator to be cooled, leading to rapid engine overheating.
Faulty Radiator Fan
The radiator needs airflow to dissipate heat. When driving at highway speeds, the air rush is sufficient. However, when idling in traffic or driving slowly, the electric or mechanical fan must activate to pull air across the radiator. If the fan motor is broken, the fan clutch is worn, or the fan relay has failed, the fan won’t spin, causing the temperature to rise dramatically when the vehicle is stationary.
Radiator Issues (Clogs or External Debris)
The radiator itself can be a source of failure:
- Internal Clogs: Rust, sludge, and debris from old coolant can accumulate and block the narrow cooling channels inside the radiator, restricting flow.
- External Obstruction: Road dirt, bugs, and leaves can clog the fins of the radiator, preventing efficient heat exchange with the outside air.
Bad Water Pump
The water pump is the heart of the cooling system; it forces the coolant to circulate from the engine to the radiator and back. If the pump’s impeller blades corrode or break off, or if the pump bearing fails (often indicated by a squealing sound or dripping fluid near the pump), the coolant stops circulating, and the engine has no way to expel heat.
Phase 5: Preventative Maintenance to Eliminate Car Overheating Risk
The best way to cool an overheated engine is to ensure it never gets hot in the first place. A simple, consistent maintenance schedule drastically reduces your risk of a roadside emergency.
1. Perform Regular Coolant Flushes and Replacements
Coolant is not a lifetime fluid. Over time, its chemical properties degrade, and the corrosion inhibitors wear out. This allows rust and scale to build up inside the system, leading to clogs.
- Schedule: Follow your manufacturer’s recommendation, typically every 30,000 to 60,000 miles, to flush the old fluid and replace it with a fresh, 50/50 mixture.
- The Right Coolant: Always use the type of coolant specified in your owner’s manual (e.g., green IAT, orange DEX-COOL, yellow HOAT). Mixing incompatible coolants can lead to chemical reactions that result in sludge, clogging the radiator and heater core.
2. Visually Inspect Hoses and Belts
The rubber components of your cooling system are exposed to extreme temperature cycles and are prone to degradation.
- Hoses: Squeeze the radiator and heater hoses when the engine is cold. They should feel firm but pliable. If they feel mushy, soft, or noticeably brittle, they need replacement. Look for swelling or bulging near the clamps.
- Belts: Check the serpentine belt that drives the water pump. Look for cracks, fraying, or missing chunks. A slipping belt means the water pump won’t turn at the correct speed, leading to reduced circulation.
3. Keep the Engine Bay and Radiator Clean
Periodically examine the front of your radiator through the grille.
- Clear the Fins: If you see a thick layer of insects, leaves, or road grime coating the radiator fins, it needs to be cleaned carefully (often by gently rinsing with a hose). External buildup dramatically reduces the radiator’s ability to dissipate heat.
4. Check the Cooling Fan Operation
Listen carefully when your car is running.
- If your A/C is on, the cooling fan should be running.
- If your temperature gauge is high, the fan should be running at maximum speed.
- If the engine is hot and the fan is motionless, the fan assembly or its relay is likely broken and requires immediate attention.
5. Always Use Clean Water When Topping Off
If you need to add fluid between flushes, always use distilled water mixed with the proper concentrate, rather than tap water. Tap water contains minerals that can precipitate out and form scale inside the cooling system, eventually causing blockages and contributing to engine overheating.
Conclusion
Successfully handling an overheated engine requires a rapid, safe response followed by a meticulous diagnosis of the root cause. Remember the cardinal rule: safety first. Never open the radiator cap on a hot engine. By pulling over, shedding engine load, using the heater trick, and patiently waiting for the engine to cool, you can minimize damage and potentially save yourself a major repair bill.
However, a temporary fix is never a substitute for professional repair. Any car that has experienced car overheating needs a complete system inspection to identify and replace the failed component—whether it is a leaky hose, a failed thermostat, or a broken water pump.
When it comes to sourcing high-quality, reliable replacement parts for your cooling or engine system, look no further. At XJXPARTS, we operate as a factory specializing in durable and precision-engineered automotive components. We understand that reliability is non-negotiable for critical systems like engine cooling. If you are a distributor, repair shop, or simply require durable parts engineered to keep your vehicle running optimally, we invite you to connect with us directly.
To inquire about our product catalog, request a quote, or discuss factory ordering, please do not hesitate to reach out to our team via our dedicated Contact Us page.